LED bead replacement:What are the signs that indicate I need LED bead replacement?
Q: What are the signs that indicate I need LED bead replacement?
A: The most common signs that indicate LED bead replacement is necessary include flickering, dimming, or completely dead segments in your LED strip or bulb. If you notice that only part of a strip lights up while the rest stays dark, it usually means one or more LED beads have failed. Another clear sign is a change in color temperature or a shift toward a bluish or purplish hue, which often happens when individual beads degrade. You might also see visible black spots or burn marks on the beads themselves. In some cases, the entire fixture may fail because the LEDs are wired in series—when one bead breaks, the circuit is interrupted and the whole string goes out. Before replacing, it's wise to test the power supply and connections, as a faulty driver can mimic bead failure. If you confirm that the issue is isolated to specific beads, replacement is the most cost-effective solution rather than buying an entirely new fixture.
Q: How do I perform LED bead replacement safely and correctly?
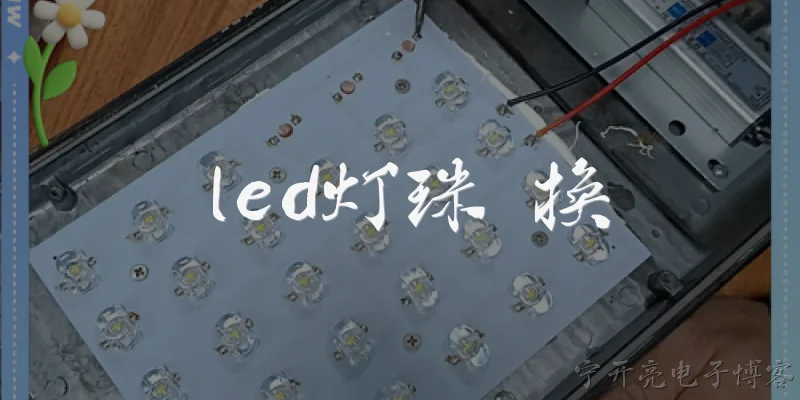
A: To perform LED bead replacement safely, start by unplugging the fixture and allowing it to cool completely. Wear anti-static gloves and use a multimeter to identify which beads are faulty. Once confirmed, you'll need a soldering iron, desoldering wick or pump, and replacement beads with matching specifications—voltage, current, color temperature, and size. Apply flux to the solder pads and use the desoldering tool to remove the old solder, then gently lift the faulty bead. Clean the pads with isopropyl alcohol, apply fresh solder to one pad, position the new bead with correct polarity (usually marked by a notch or dot), and solder both sides. Avoid overheating the bead; keep the iron under 350°C and work quickly. After replacement, test the strip before reassembling. If you're not comfortable soldering, consider replacing the entire strip or module instead. Always ensure the replacement bead matches the original electrical specs to prevent premature failure or damage to the driver.
Q: Can I replace a single LED bead, or should I replace the whole strip?
A: Whether to replace a single LED bead or the entire strip depends on several factors. If your LED strip is made of individually addressable beads or has clearly separated segments, replacing a single bead is feasible and cost-effective, especially if only one or two have failed. However, most modern LED strips are densely packed and wired in series or parallel, making single-bead replacement tricky without specialized tools. Also, if the strip is old, other beads may be near the end of their lifespan, so a single fix might be short-lived. For high-quality strips with consistent binning, a single bead replacement can work well if you match the exact specifications. But for cheap or integrated strips where beads are surface-mounted on a flexible PCB, it's often more practical to cut out the faulty section and splice in a new segment, or replace the entire strip. Consider the cost of tools and your time: if the strip is inexpensive, full replacement is usually faster and more reliable than a meticulous single-bead repair.
Words of experience
Common scenarios of "LED bead replacement"
【Customer】 Hi, I have a string of LED lights where one bead is flickering and then went out. Can I just replace that single bead?
【Technician】 Yes, in most cases you can replace a single LED bead if the strip is not sealed with epoxy and the pads are accessible. But first we need to confirm the type: is it a standard 5050 or 3528 SMD, or a through-hole LED?
【Customer】 It looks like a small square surface-mount chip, about 5mm by 5mm. I think it's a 5050.
【Technician】 That's likely a 5050. You'll need a replacement LED with the same color temperature and forward voltage. Do you know the voltage rating? Usually 5050 beads are 3V or 6V.
【Customer】 I'm not sure. The strip says 12V and has resistors near each LED. Does that mean the LED itself is 3V?
【Technician】 Not necessarily. With 12V strips, LEDs are often grouped in series of three, so each LED could be around 3V, but some have built-in resistors. The safest is to measure the voltage across the bad LED with a multimeter while the strip is on, or check the resistor value.
【Customer】 I can measure. But if I replace it, do I need to match the exact bin and color? I'm worried it will look different.
【Technician】 Yes, matching the color bin is important for uniform appearance. If you can't find the exact bin, you may need to replace a whole segment or accept a slight color difference. Also, the replacement should have the same forward current rating.
【Customer】 Okay. How do I remove the old LED without damaging the strip?
【Technician】 Use a hot air rework station at around 300°C with low airflow, or a soldering iron with a wide tip and plenty of flux. Heat both pads simultaneously and lift the LED gently. Be careful not to overheat the PCB, or the pads may lift.
【Customer】 What if I don't have hot air? Can I use a regular soldering iron?
【Technician】 You can, but it's trickier. Add solder to both pads to create a bridge, then alternate heating the two ends until the solder melts on both sides. Use tweezers to lift the LED. Clean the pads with solder wick afterward.
【Customer】 Got it. Once removed, how do I align the new LED? It has a polarity mark, right?
【Technician】 Yes, there's usually a notch or a dot on one corner indicating the cathode. Match it to the silkscreen or the original orientation. If you reverse it, the LED won't light. Also, pre-tin the pads and the LED terminals before placing.
【Customer】 Should I use lead-free or leaded solder? The original looks lead-free.
【Technician】 For repair, leaded solder is easier to work with because it melts at a lower temperature. But if you want to maintain RoHS compliance, use lead-free. Just adjust your iron temperature to about 350°C for lead-free.
【Customer】 After soldering, how do I test it? Just power it up?
【Technician】 First check for shorts with a multimeter in continuity mode. Then power the strip and see if the LED lights. If it doesn't, check polarity and solder joints. If it's dim, the forward voltage may be mismatched.
【Customer】 What if the replacement LED is slightly different in brightness? Can I adjust with a resistor?
【Technician】 If the strip has per-LED resistors, you could change the resistor value, but it's usually not practical. Better to use an LED with the same luminous flux bin. If brightness differs, it might be noticeable in a row.
【Customer】 I see. Is there a risk of damaging adjacent LEDs when heating?
【Technician】 Yes, excessive heat can damage neighboring LEDs or the adhesive. Use Kapton tape to mask adjacent components and keep the heat localized. Work quickly and let the board cool between attempts.
【Customer】 Okay, I'll try. Any recommended tools for a beginner?
【Technician】 A temperature-controlled soldering iron with a fine tip, good flux, solder wick, tweezers, and a multimeter. A magnifying lamp helps too. Practice on a scrap board first if you can.
【Customer】 Thanks. If I fail, can I just bypass the LED with a wire?
【Technician】 You can, but that will increase the voltage across the remaining LEDs in that series string, which may cause them to fail sooner or change brightness. It's a temporary fix at best. Better to replace the LED properly.
【Customer】 Understood. I'll order the correct LED and give it a try. Appreciate the help!
【Technician】 You're welcome. Good luck, and feel free to ask if you run into issues.